

Whether you are filling a transparent glass concentrate jar with homemade skincare, bottling jam for long-term storage, or repacking ingredients for resale, the step nobody should skip is sterilization. A jar that looks clean can still carry bacteria, mold spores, or yeast that will ruin your product — or worse, make someone sick. The good news is that sterilizing glass jars at home or in a small workshop is simple, and the best method is well established.
But there is no single answer for every situation. The right technique depends on what you are filling, whether your jars have plastic or rubber components, and how many jars you need to prepare. This guide compares the proven methods and tells you exactly which one to use when.
Why Sterilizing Glass Jars Matters
Glass itself is not food or a growth medium for microbes — but the jar's surface certainly can be. During manufacturing, storage, and handling, jars pick up dust, residues, and microorganisms. If you fill a jar without sterilizing it:
- Food preserves can ferment, mold, or spoil long before their intended shelf life.
- Cosmetics and skincare can become contaminated with bacteria that cause skin irritation or infections.
- Liquid concentrates can degrade in quality and safety.
Sterilization eliminates these risks by destroying microorganisms on the glass surface before your product touches it. For products intended to be stored at room temperature for weeks or months, this step is non-negotiable.
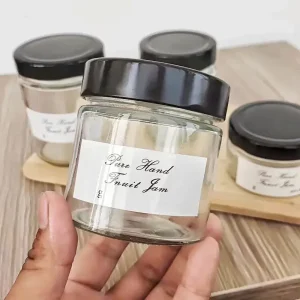
Step One: Clean Before You Sterilize
Sterilization only works on a surface that is already clean. Organic residue can shield microbes from heat, so always follow this order:
- Wash the jars and lids in hot, soapy water.
- Scrub away any residue, especially in threads and corners where product often collects.
- Rinse thoroughly to remove all soap.
- Inspect every jar for chips, cracks, or scratches — discard any damaged jar. Defects weaken the glass and can cause breakage during heating.
Only after cleaning is the jar ready for sterilization.
Method 1: Boiling Water — The Gold Standard
The boiling water method is the most reliable and widely recommended technique, and it is the method endorsed by food preservation authorities for canning. It is also the only home method suitable for sterilizing metal lids and caps.
How to do it:
- Place the clean jars upright (or on their sides) in a large pot, using a rack or a folded towel at the bottom so the glass does not touch the pot directly.
- Fill the pot with cold or room-temperature water until the jars are completely submerged, with at least an inch of water above them. Never add jars to already-boiling water — the sudden temperature change can crack the glass.
- Bring the water to a rolling boil and boil for at least 10 minutes.
- If you live above 1,000 feet in elevation, add one extra minute for each additional 1,000 feet.
- Leave the jars in the hot water until you are ready to fill them, then remove them with clean tongs and shake out the water.
Best for: canning, food preserves, and any application where the jars and lids are all heat-safe.
Method 2: Oven Sterilization — Best for Large Batches
When you need to sterilize many jars at once and want to keep your stovetop free, the oven method is an efficient alternative.
How to do it:
- Preheat the oven to about 225–275°F (110–135°C).
- Place the clean, dry jars upright on a baking tray, spaced so they are not touching.
- Heat them in the oven for 25–30 minutes.
- Never exceed about 300°F (150°C) — higher temperatures can stress or break the glass.
- Remove the jars with oven gloves and let them cool slightly before filling.
Important: do not use the oven method for plastic lids, rubber seals, or dropper components — high heat will damage them. Sterilize glass parts in the oven and treat lids separately.
Best for: large batches of glass jars, especially when your pots are too small for many jars at once.
Method 3: Dishwasher — Convenient but Limited
Many dishwashers have a sanitize or high-heat cycle that can clean glass jars effectively. This works well as a cleaning-plus-sanitizing step for everyday use, and it is especially handy when you are preparing jars in volume.
The limitation: a standard dishwasher cycle does not guarantee the sustained high temperature of true sterilization, so for long-term food storage or sterile cosmetic filling, combine it with a boiling water step or choose a dedicated method. For short-term use — a clean jar you will fill and refrigerate soon — a dishwasher sanitize cycle is usually sufficient.
Best for: quick, everyday preparation and jars destined for short-term refrigerated storage.
Method 4: Alcohol — For Delicate Components and Cosmetics
When a jar has plastic or rubber parts that cannot tolerate boiling, or when you are working with cosmetics and concentrates where heat might be undesirable, isopropyl alcohol is the practical choice.
How to do it:
- Wash and rinse the jar thoroughly.
- Use 70% isopropyl alcohol (not lower concentrations, which lack reliable antimicrobial action).
- Rinse or spray the entire interior and exterior surface with the alcohol.
- Allow it to air dry completely before filling.
Because alcohol evaporates quickly and leaves no residue, this method is popular for cosmetic filling lines and for transparent glass containers where a spotless, water-free interior matters.
Best for: glass jars with plastic lids, cosmetic and concentrate applications, and situations where heat is not practical.
Sterilize vs. Sanitize: Know the Difference
These two words are often used interchangeably, but they mean different things:
- Sanitizing reduces the number of microorganisms to a safe level.
- Sterilizing destroys virtually all microorganisms, including spores.
For short-term, refrigerated use, sanitizing may be enough. For anything you plan to store at room temperature for weeks or months — canned food, water-based cosmetics, or concentrates without preservatives — aim for true sterilization using the boiling water or oven method.
Choosing the Right Method for Your Product
To make it easy, here is a quick guide:
| Situation | Recommended Method |
|---|---|
| Canning and long-term food storage | Boiling water (10+ minutes) |
| Large batches of glass jars | Oven (225–275°F, 25–30 min) |
| Jars with plastic or rubber lids | Alcohol (70% isopropyl) or clean lids separately |
| Everyday short-term storage | Dishwasher sanitize cycle |
| Cosmetics and concentrates | Boiling for glass parts + alcohol for delicate parts |
Whichever method you choose, the same principles apply: always work with clean, chip-free jars, avoid sudden temperature changes, and handle sterilized jars with clean tools so you do not re-contaminate them.
Frequently Asked Questions
How long should I boil jars to sterilize them? At least 10 minutes at a rolling boil. Above 1,000 feet of elevation, add one minute per additional 1,000 feet.
Can I sterilize glass jars in the oven? Yes. Heat clean, dry jars at 225–275°F (110–135°C) for 25–30 minutes, and never exceed about 300°F (150°C) to avoid glass breakage.
Can I sterilize lids and caps with the jars? Only if the lids are fully heat-safe. Metal canning lids can be boiled, but plastic lids and rubber seals should be cleaned with soapy water or alcohol instead.
Do I need to sterilize jars for a product I will refrigerate? For short-term refrigerated use, a thorough wash and sanitize cycle is usually sufficient. For anything stored at room temperature long-term, use full sterilization.
Why does my glass jar crack when I sterilize it? Thermal shock — a sudden change in temperature — is the usual culprit. Always start with cold water and heat gradually, never place cold glass into boiling water, and discard any jar with pre-existing chips or cracks.
The best way to sterilize glass jars comes down to three factors: what you are filling, what your lids are made of, and how long the product must last. For most long-term uses, the boiling water method is the reliable gold standard; for cosmetics, concentrates, and delicate components, alcohol and careful handling win. Whatever you are packaging — including a transparent glass concentrate jar for your own skincare or concentrates — a properly sterilized container is the first step to a safe, professional result. If you are sourcing high-quality glass packaging and need advice on choosing the right jar for your product, our team is here to help — contact us and we will be glad to assist.
Post time: 09-03-2026